Do you want to configure the WordPress settings after installing WordPress?
In this post, we discuss the 19 WordPress settings you need to configure after installing WordPress.
If you are yet to install WordPress, follow the step-by-step guide on how to install WordPress for beginners.
Here is the list of most important WordPress settings after installing WordPress
Change Password
After setting up WordPress, the first thing that you should do is reset your password. Hackers can compromise your site if you are using common types of passwords like your name, pet’s name, vehicle registration number, etc.
Use WordPress built-in tools to generate strong passwords.
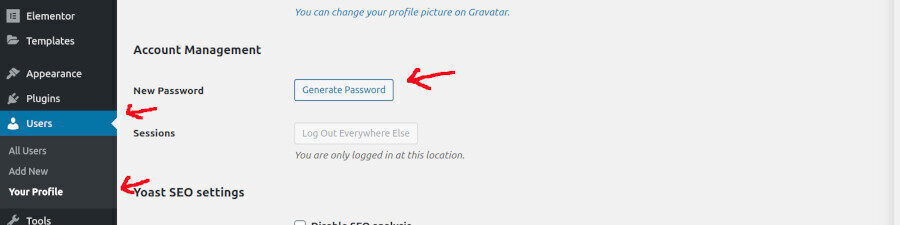
- On the Dashboard left Menu hover over Users > Your Profile
- At the bottom of the profile page locate the Account Management section.
- Click on the Generate Password button, and a new password will be generated. You should copy the password and keep it secure in a password manager.
After saving the password click on the Update Profile button. You will be logged out and now log in using your new password.
General Settings
Site Title and Tagline
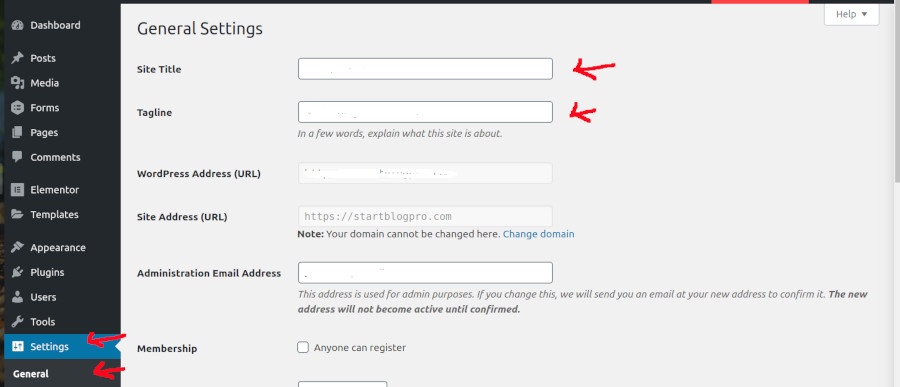
During the WordPress install process, we select a random website title and tagline. So these should be the first that we should change.
- Login to WordPress
- Hover your mouse over the Setting.
- Click on the General tab.
- Adjust the general settings of your website like the title and tagline.
Date and Time Settings
Your website is visible across the globe. So it’s important to set your date and settings. Many online processes are dependent on this setting.
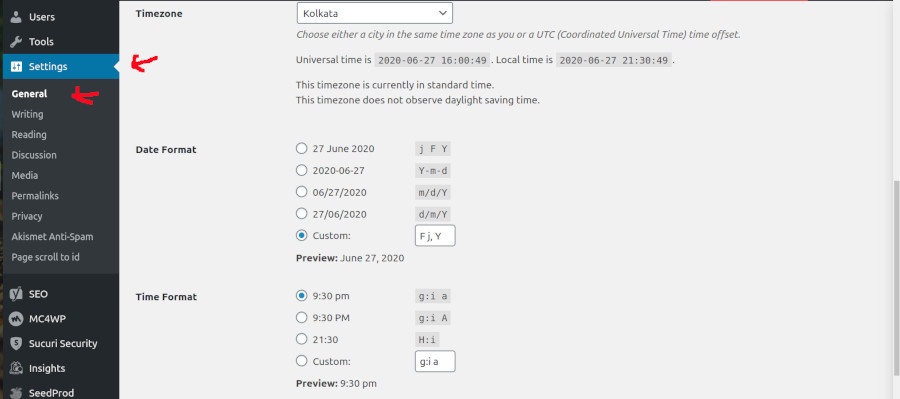
It also ensures to display of the correct date and time on your website.
Add Logo
The logo is an image that identifies your website and helps in the branding of your site.
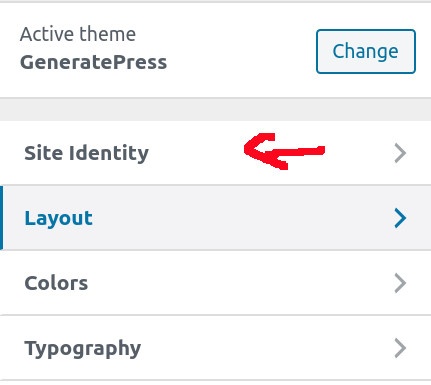
- Click on Appearance > Customise on the left menu bar
- Click on the Site Identity tab.
- Under the Logo field click on the select logo.
- In the next window, you can upload the logo from your computer or your media library.
- Don’t forget to publish the changes.
Add Favicon
You must have seen a small icon next to a website title in the browser. It’s called a Favicon.
A favicon helps in branding and building trust and recognition for your website.
- From the WordPress dashboard menu Click on Appearance > Customise
- Click on the Site Identity tab.
- As in the image above under the site icon option click on the select site icon.
- Upload the site icon from your computer or your media library and publish the changes.
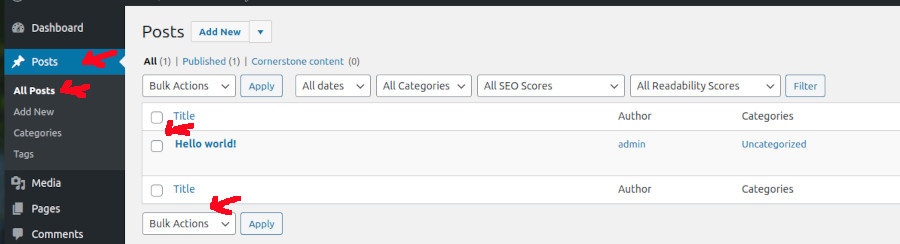
Remove Default Content
On installing WordPress some default content like default hello post, sample page, and comments are added, We don’t want this default content to be indexed by search engines. So it’s better to delete this content immediately after installation of WordPress.
Configure Permalink Structure
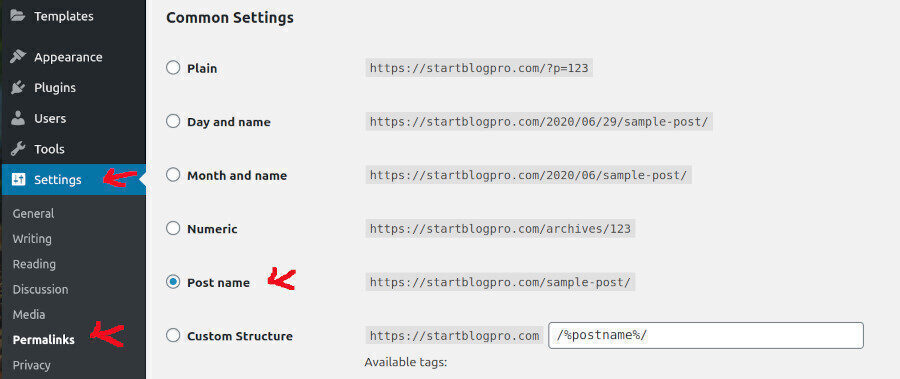
Permalink Structure is the structure of the URL (web address) that is added automatically whenever you create a new WordPress post or article. WordPress has a default template for this web address.
The default permalink structure looks like this:
http://yoursite.com/?p=123
This default permalink structure is not Search Engine Optimized and doesn’t look presentable.
Change the default setting using WordPress Admin Area.
- Login to your WordPress admin area.
- On the left menu hover your mouse over Settings.
- A dropdown will appear with a Permalink option.
- Click on Permalinks
- Select the option Post Name
Google Search Console
In order for Google to find and index your web content effortlessly, link your site using Google Search Console.
You can sign up using your Google account and you need to add your property
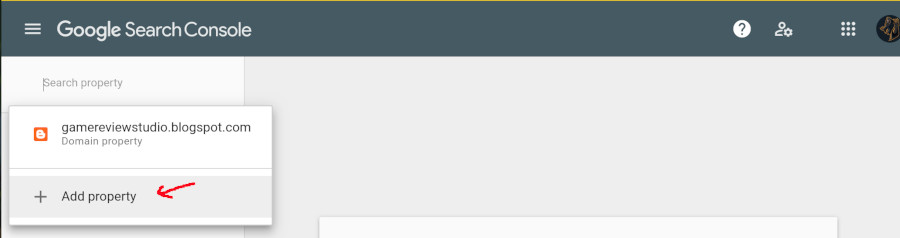
Now select property type as shown below but with your domain name in place of example.com
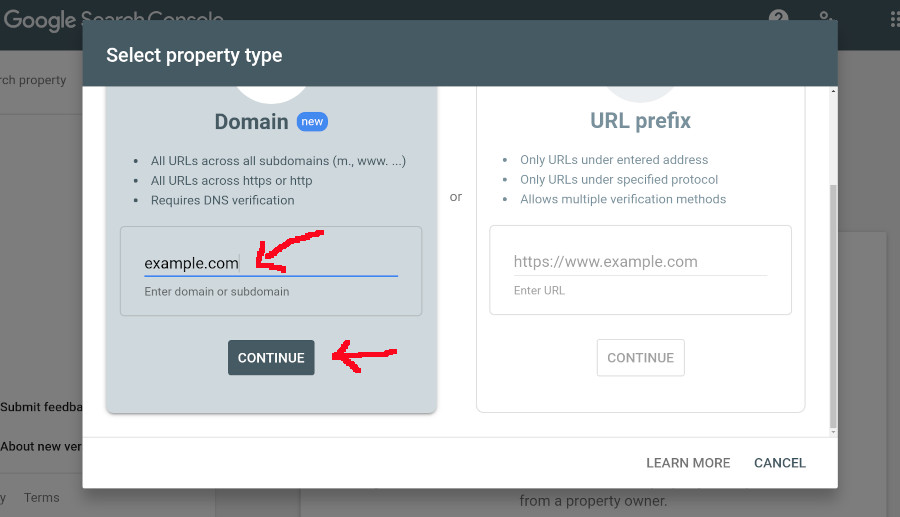
Next, you have to verify the property. There are different methods to verify your website, choose anyone and proceed.
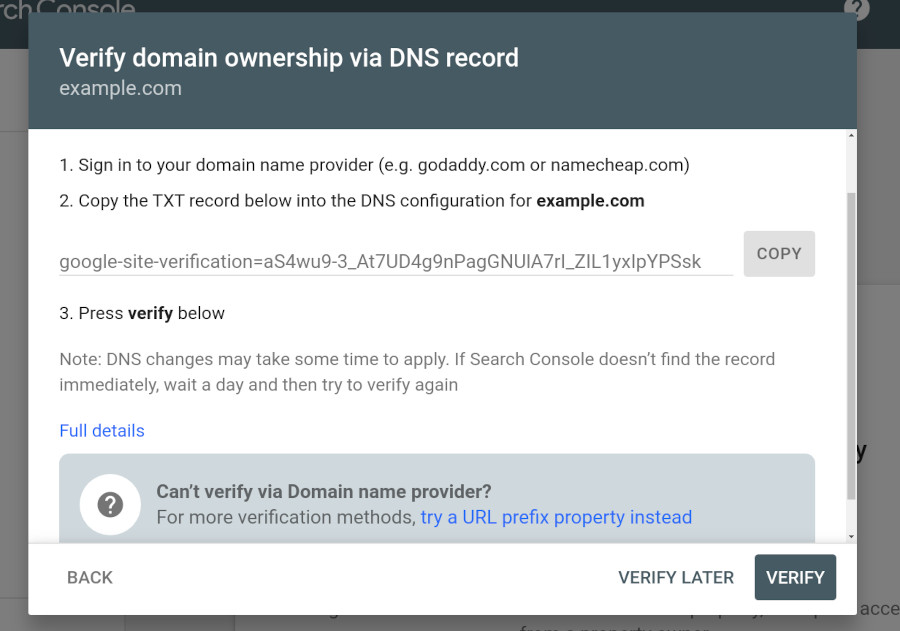
Google will index your site in a few days and you will start getting the crawling and indexing data. Google Search Console also helps in identifying any errors it encounters on your website.
You should also submit your WordPress sitemap after verifying your site. Sitemaps help google index your site faster.
Check this step-by-step article on how to create a WordPress Sitemap for beginners.
Google Analytics
Google Analytics helps you analyze your website visitors’ data.
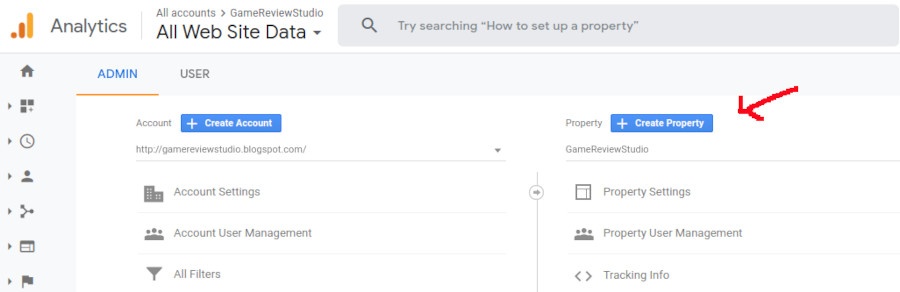
Visit Google Analytics and sign in using your Google account. On the dashboard enter the name of the website you want to track.
If you are using a WordPress plugin you can log out. Analytics can be configured through the WordPress plugin.
A tracking code is not required to authenticate your site if you are using a WordPress Plugin. The Plugin will link your website to the Google Analytics account.
We have already installed Google Analytics plugins by MonsterInsights
- Log in to the Admin Area of the WordPress site.
- Click on Insights and next on Settings.
- Click on the authenticate with Google option and enter your Gmail address along with a password. Now the plugin will add your Google Analytics account and you can select a tracking code to use on this site using the drop-down Google Analytics Account.

If it’s your first site you will get only a single site name. Go ahead and select your account.
This completes the settings related to Google Analytics on your WordPress site. After a few days, you can check your traffic on the Google Analytics Dashboard.
Is Your Site Visible To Search Engines?
- Log in to the Admin area and hover over Settings.
- Click on Reading.
- Uncheck the checkbox Search Engine Visibility.
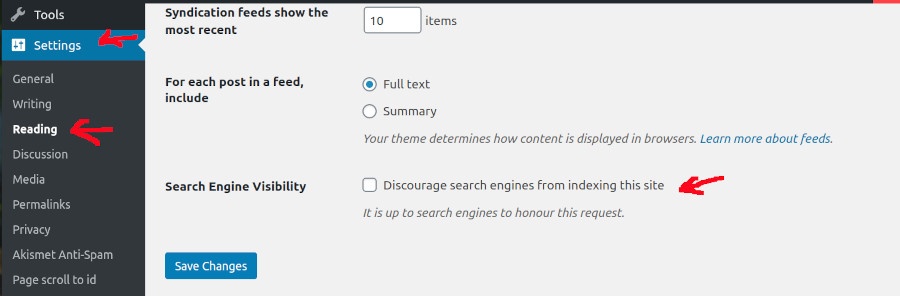
Now your website can be crawled by search engines.
Configure SEO Plugin
When you are just starting out the major source of traffic will be search engines. SEO plugins optimize your site for better search engine visibility. You can select from two of the most popular plugins
- Yoast SEO
- All in one SEO
Improve Page Load Speed
Page load speed is one of the google search ranking factors. If you want better visibility on search engines do consider one of the following plugins.
- WP Rocket
- WP SuperCache
Image Optimisation
A high-resolution image is better but they slow down the page loading speed. So in order to keep page load speed under check, you can install one of the following plugins
- WP-Smush
- Imagify
- Short Pixel Image Optimise
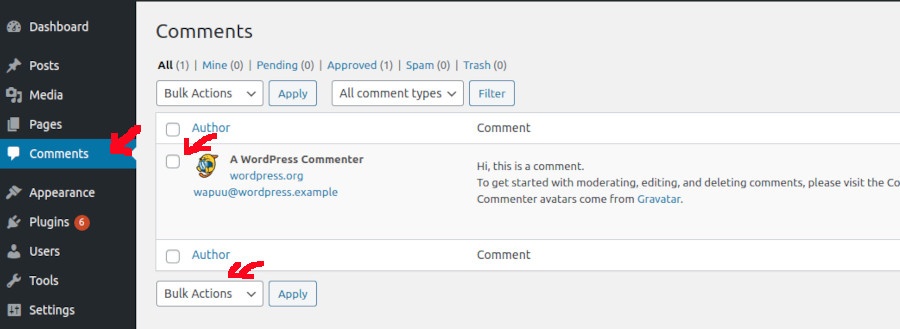
Anti-spam Plugins
In order to filter out spam comments, you can install a plugin called Spam Honeypot. This plugin will not completely remove all the spam comments.
These additional settings eliminate spam comments to a large extent.
- In your WordPress admin area go to Settings and click on Discussion.
- Here we can disable the comments altogether but instead select the checkbox options Before a Comment Appears.
- This helps you in moderating the comments before they are published on your website.
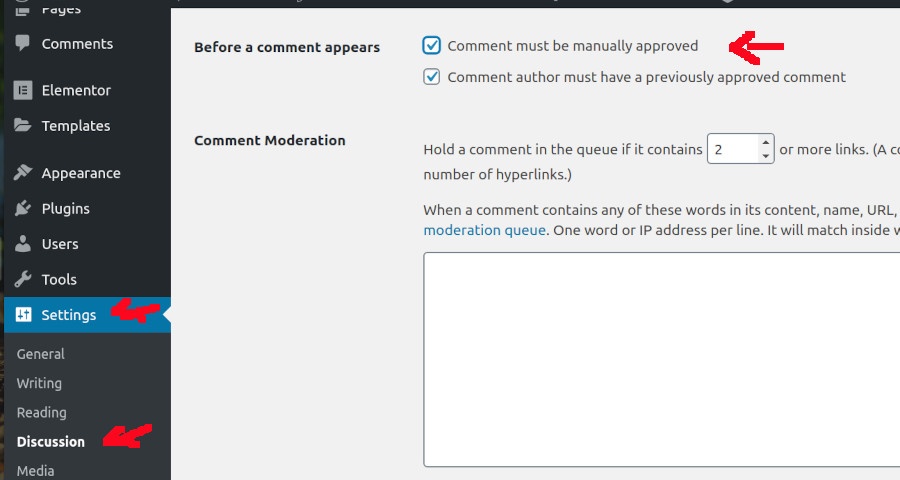
This will help you in eliminating a lot more spam comments and inappropriate content.
In order to control unwanted automated WordPress spam-like comments and trackbacks. You can also install one of the following plugins
- Akismet
- GrowMap
- AntiSpamBot
Add Contact Form
The contact form plugin helps you in creating useful forms for your site. Your website visitors can contact you after filling out a form on your website. They also block unwanted automated spam. You can use one of the following
- WPForms
- Gravity Forms
Backup your website
Regular backups of your website can help you recover your website in case of a disaster
If your hosting doesn’t offer regular backups. You can use the following WordPress Plugins
- UpdraftPlus
- WP Time Capsule
- BackWPup
WordPress Security
WordPress platform is secure out of the box. However, it is always better to keep updating your defenses.
You should use strong passwords and install updates regularly.
In order to prevent malware and firewall your website, you should install a plugin like Sucuri. Sucuri comes with malware protection and a firewall tool
Remove Unwanted WordPress Themes and Plugins
Unwanted Themes and Plugins bloat up your website. These unwanted items annoy you with update reminders. So it’s better to get rid of them.
In order to remove WordPress Theme
Dashboard > Appearance > Themes
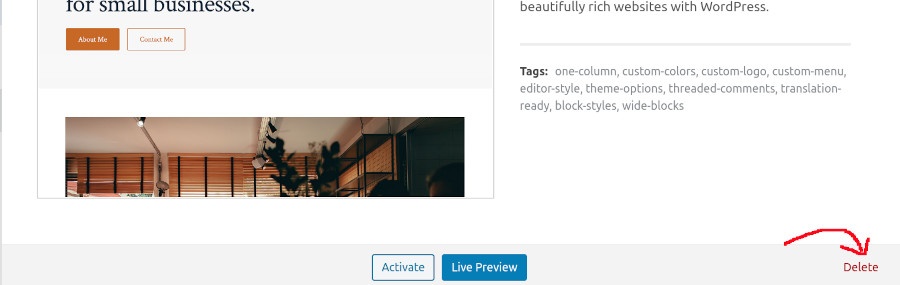
Hover your mouse over the theme you want to delete you will see a Details option. Click on the Details option
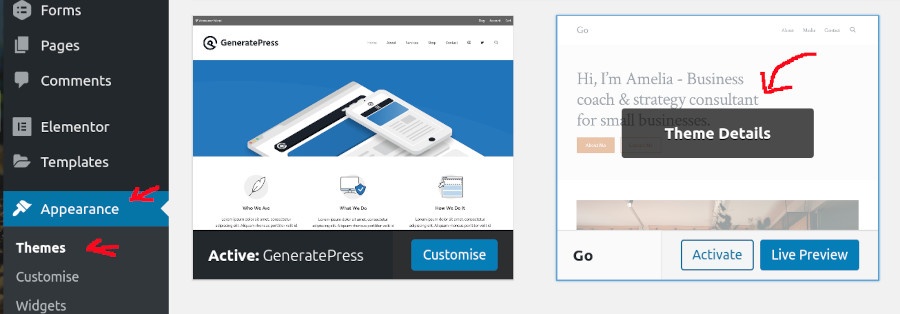
On the following page, there is a delete option on the right side bottom
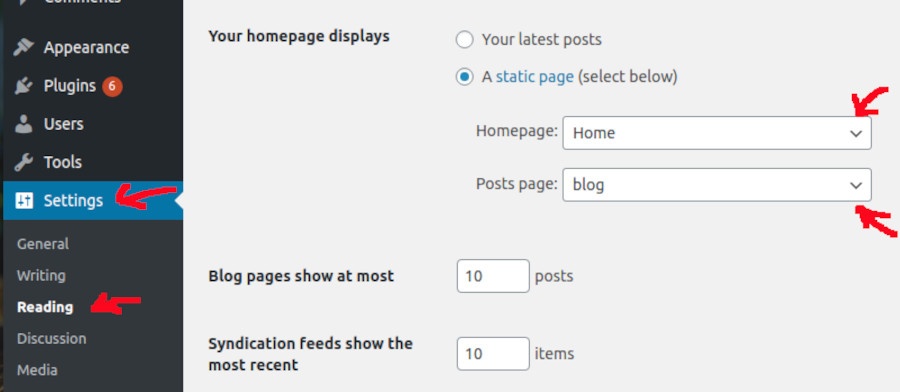
Setup Homepage and Blog page
WordPress will display your blog posts on the homepage. If you want to set up a static page as your homepage it’s quite easy.
Dashboard > Settings > Reading
Under the Reading tab, you will see an option Front page displays. Select the A Static Page option and in the option below select the pages as per your preference.
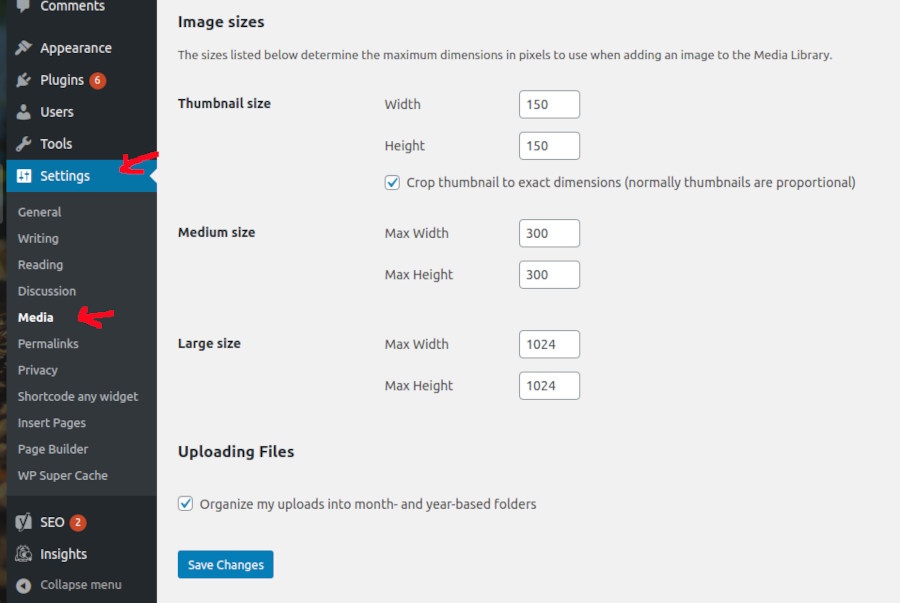
WordPress Media Settings
Media setting helps improve the way WordPress handles images.
By default, WordPress creates multiple sizes for each uploaded image. These multiple images load your website with unnecessary files and your website becomes bloated.
Go to Settings > Media, and use the settings given below
I hope this helps you. Please comment and let me know if I have left anything
Conclusion
After you install WordPress, you need to configure its various settings. We have covered the 19 most important WordPress.
If I have left any settings, let me know in the comments below.
Pingback: How To Use The WordPress Block Editor? | StartBlogPro
Pingback: How To Create a Blog? Easy Blog Set-Up | StartBlogPro
Pingback: Backlink Basics: Link Building for Beginners | StartBlogPro
Pingback: How To Customize WordPress Theme? (3-Ways) | StartBlogPro