You have a brand new WordPress installed, but you are not satisfied with the default theme.
If you looking forward to installing a new WordPress theme and don’t know how to install a WordPress theme.
I will help you out in choosing and installing a WordPress theme with step-by-step instructions and detailed pictures.
Things to do before you Install WordPress Themes
You should have a domain name and required hosting. If not you should sign up for a domain and choose a good WordPress hosting.
Next, install WordPress and then head over to add a new theme page in the WordPress admin area.
What to Look for in a WordPress Theme?
- Check out the reviews, ratings, and frequency of updates provided by the developer of the WordPress theme.
- The theme should be fast-loading and lightweight.
- It should be optimized for SEO and mobile devices
- If the theme has a demo available, give it a try and check out the appearance and features. The actual looks of a theme come out when the content is added to the website. So make sure you should have some content real or dummy like lorem ipsum etc.
Once all the above tasks are taken care of we are ready for installing a WordPress theme.
Install a WordPress Theme Using the Admin Theme Search Method
If you want to install a free WordPress theme you can search the WordPress.org themes directory.
One of the best things is you can search the WordPress theme directory from within your WordPress admin panel.
Login to your WordPress Admin Area. then hover over Appearance >> Themes.
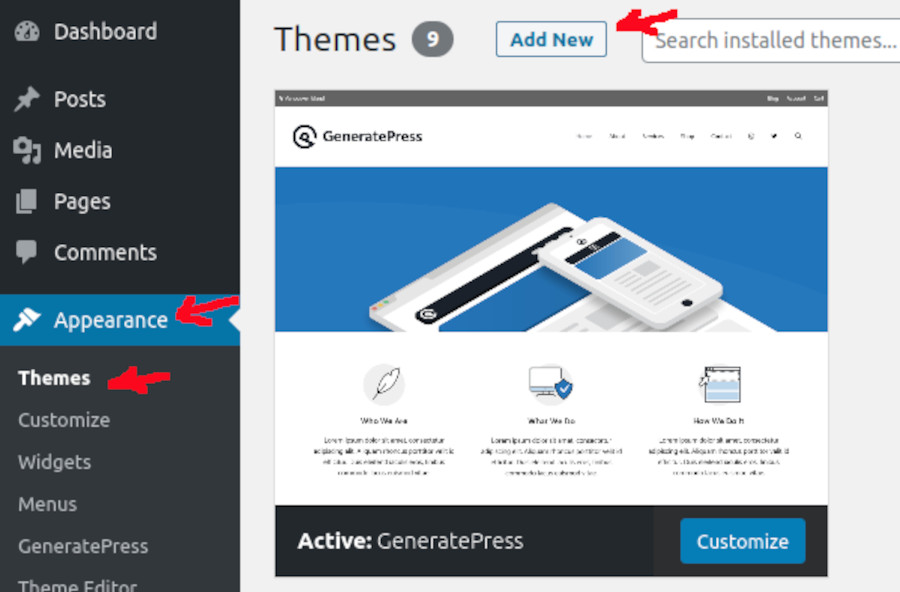
Click the Add New Button on the Themes page

On the Add Themes page, you will see the following tabs
- Featured – The featured themes on WordPress
- Popular – The popular themes
- Latest – New themes
- Favorites – Themes that you have added to favorites
- Feature Filter – Find a theme based on a criteria
- Search themes bar – Search theme using keyword
These are different search criteria to look for your theme. Let’s check out the Feature Filter tab.
You can see different search criteria like subject, features, layout, etc.
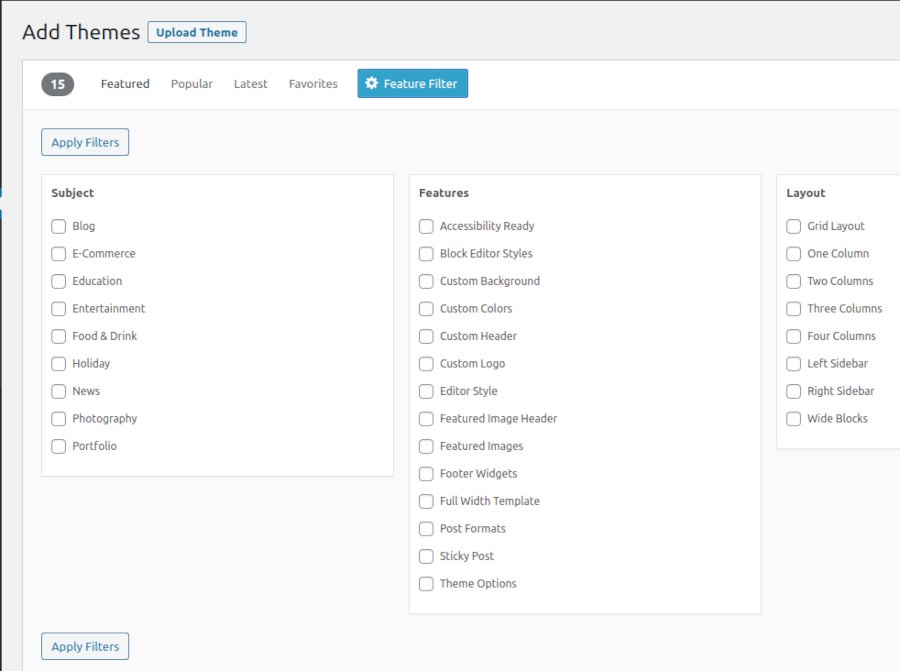
Search for the theme based on these different criteria. When you zero in on a theme, Hover. your mouse over the theme and you will see install, preview, and details buttons.
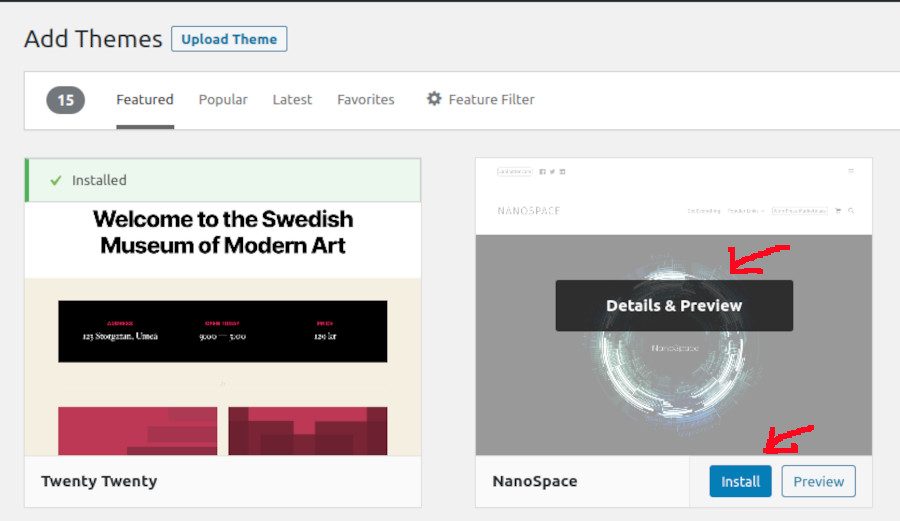
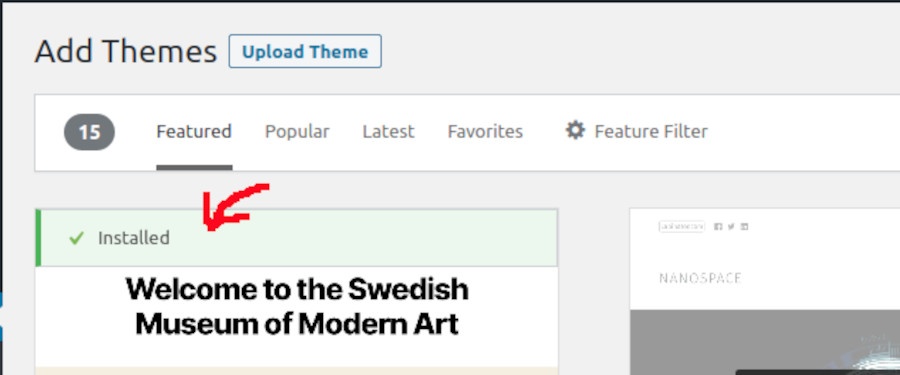
Click on the install button. On completion of the WordPress theme installation, you will be shown an install success message as shown below.
You can also have a live preview before activating the theme.
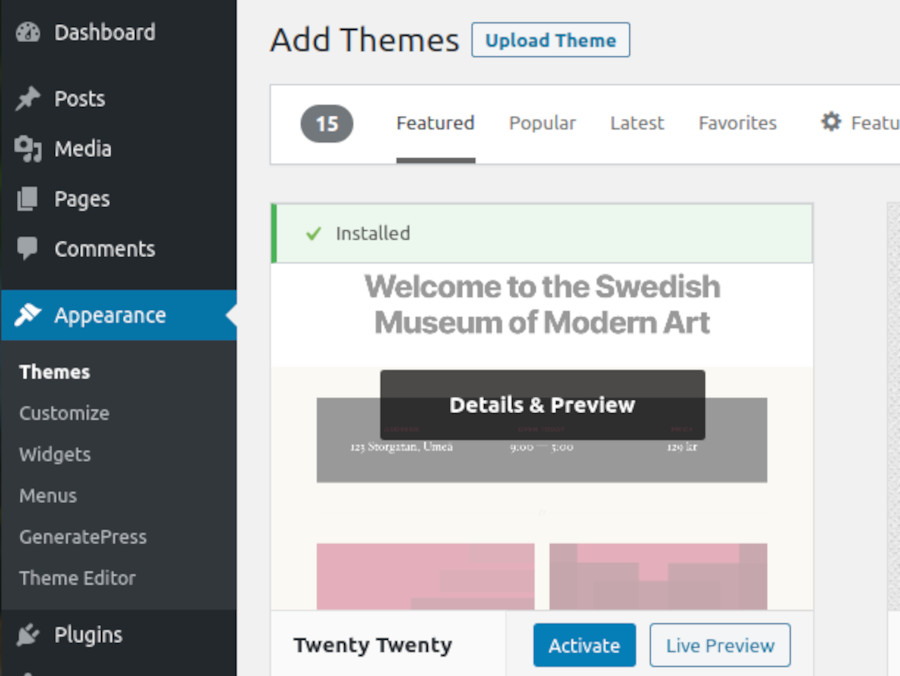
Next click on the activate button you will get a new theme-activated message.
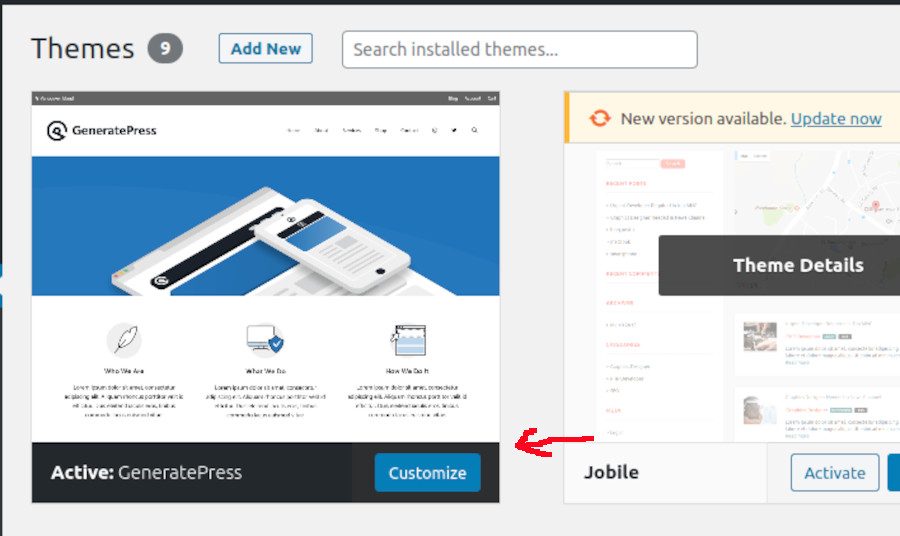
Now you can further customize your freshly installed WordPress theme using the customize button now visible on the installed theme.
Installing a Theme Using WordPress Admin Upload Method
In the first method, we installed a free theme from the WordPress.org themes directory.
If you want to install a premium theme you have to use this method.
You can purchase a premium theme from companies like Elegant Themes, StudioPress and Themify. These companies provide the theme in a zip format.
Download the theme after completing your purchase.

Now in your WordPress admin area dashboard Appearance >> themes page. On the themes page, click on Add New button as shown below

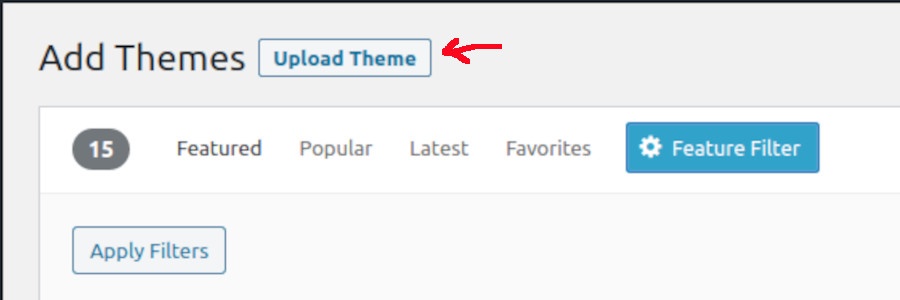
On the Add Themes page click on the Upload Theme button.
Next, you will see a Choose File option. Click on this button and select the premium theme zip file. Click on the Install Now button.

After the completion of the theme installation, you will get a theme installed successfully message.
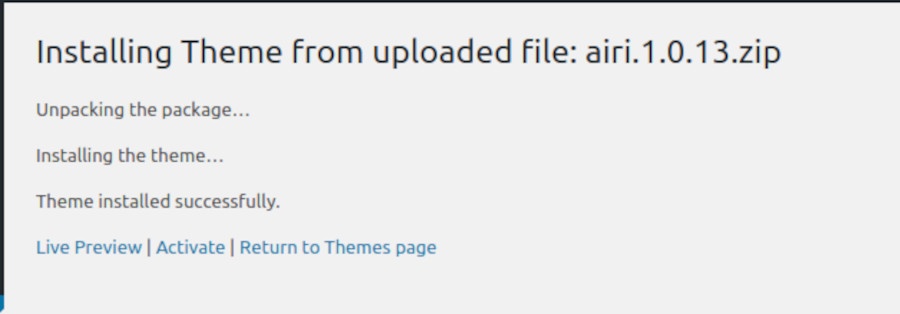
Now you activate the freshly installed WordPress theme by clicking on the Activate link.
WordPress Install Theme FTP Method
The FTP stands for file transfer protocol. It is software that uses the FTP protocol for transferring files between PCs and websites. For e.g FileZilla
WordPress theme installation using FTP requires a little advanced level of technical knowledge.
If in doubt follow the two methods discussed above.
Let’s begin installing the WordPress theme using the FTP method.
After you have downloaded the WordPress theme zip file. Create a new folder and rename the folder as the name of your theme. Extract/Unzip the downloaded zip file into this new folder.
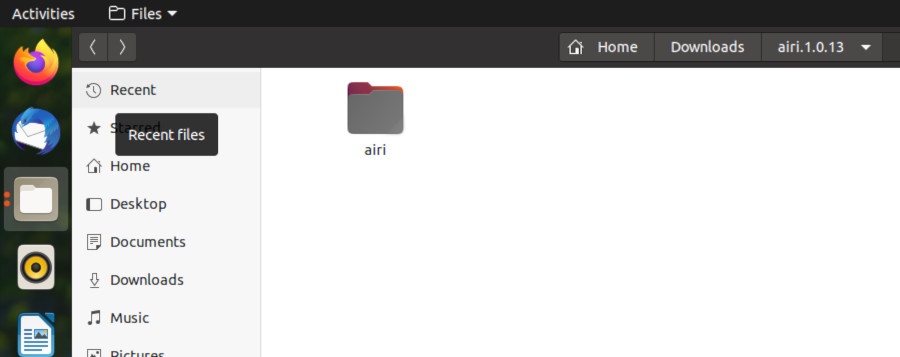
Fire up your FTP client and select the unzipped theme folder on your computer. Right-click on the folder and click on upload.
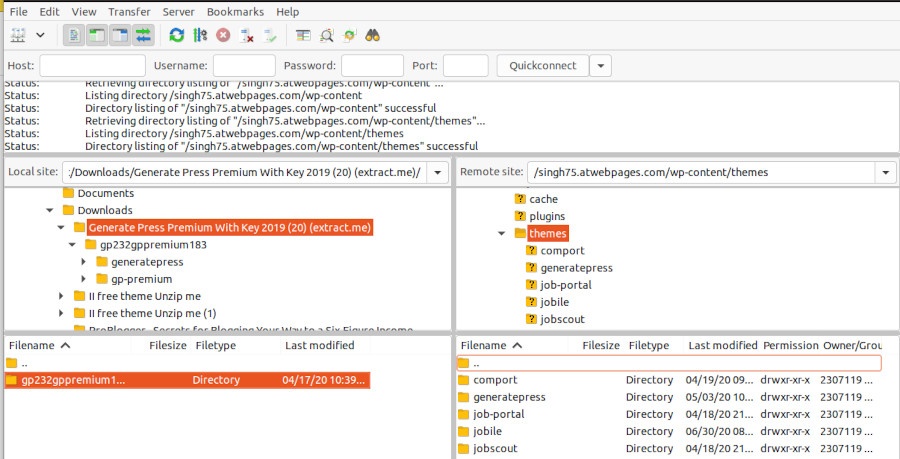
On completion of theme transfer, go to the admin dashboard of your WordPress website and click on Appearance >> Themes

The uploaded theme will be visible here. Hover your mouse on this theme and click the activate button.
How to Customise Your WordPress Theme?
The first thing to do is to click around and check out all the options available in your theme.
On the WordPress dashboard menu Appearance > Customize
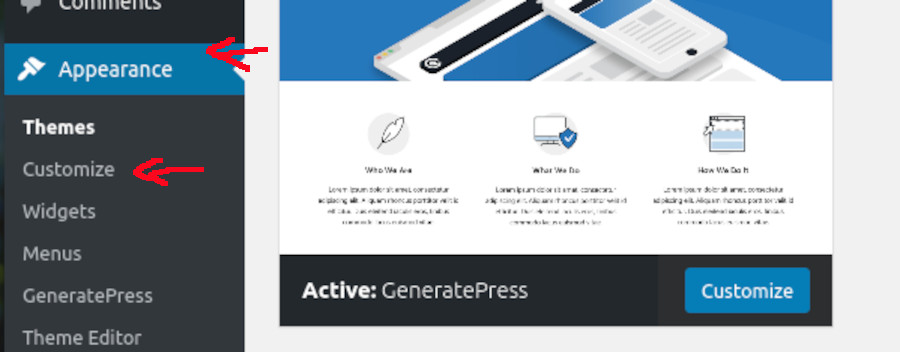
The WordPress Customiser is a live preview tool. You will be able to view the changes that you make on your site.
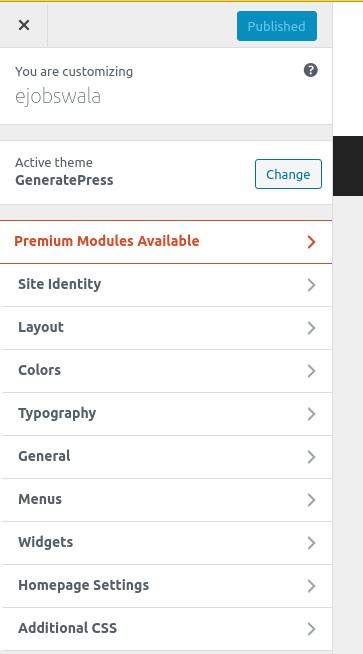
Some of the common changes you apply to your theme are:
- Select colors and color schemes
- Home page setup
- Choose layout and menu options
- Change site info background and header images
- Add social media links like Twitter and Facebook.
Set up Widgets
Widgets add blocks of content to the predefined area of your theme.
There are a large number of WordPress widgets to add extra content like the latest posts, popular posts, etc.
To add a widget head on to Appearance > Widgets.
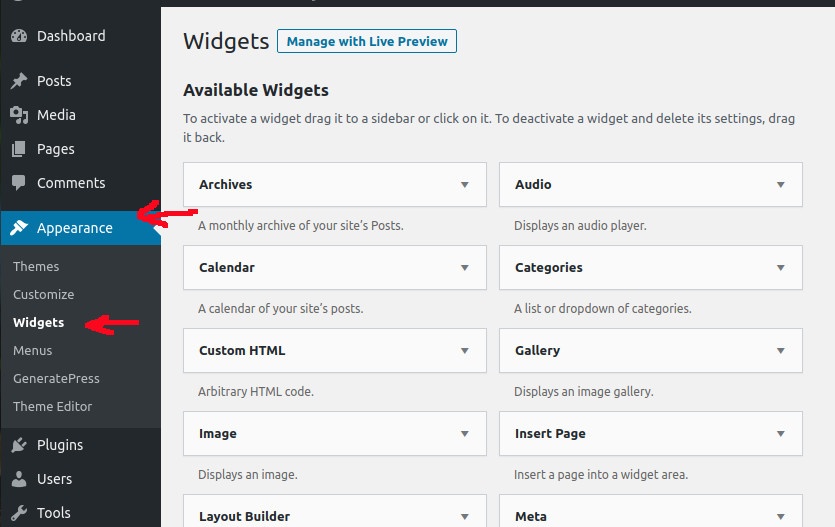
You will see a lot of widgets on the left-hand side of the widget area. These widgets can be dragged to the right side for adding them to the layout.
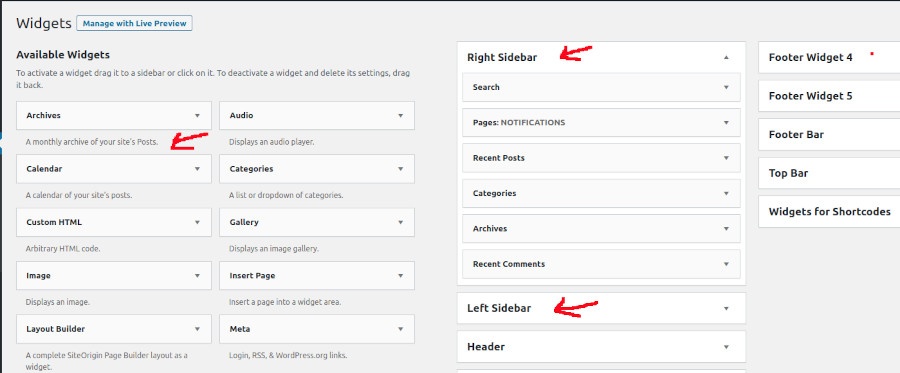
If you want to check the function and features of widgets, go through the description of the widget.
Some of the themes may require additional plugins to be installed. You can install them one by one or use a bulk installer in the drop-down menu.
Refer to the theme’s documentation for advanced customizations. You can find the documentation links in your theme or you can check the theme’s website.
A quick google search as below will help you out.
theme name + documentation

If you have any doubts about how to install a WordPress theme. You can ask by commenting below

![You are currently viewing How To Install a WordPress Theme For Beginners [2023]](https://startblogpro.com/wp-content/uploads/2022/09/How-to-install-wordpress-theme.png)
