Want to know how to install Jetpack on your WordPress website? A self-hosted WordPress website is highly flexible. You can customize its design and functionality using various plugins.
But, managing and maintaining multiple plugins is time-consuming. That’s where the Jetpack plugin comes in. Jetpack packs many features into a single user-friendly plugin.
In this article, we’ll guide you on how to install Jetpack on your WordPress site. Here are the points we cover:
The Power of Jetpack Plugin

Jetpack offers a range of invaluable features to supercharge your self-hosted WordPress blog. Let’s discuss some of its essential features.
1. Sidebar Image Widget
Jetpack provides a convenient sidebar image widget. Allowing you to showcase appealing images in your blog’s sidebar. This widget enhances the overall aesthetics of your website. Thus, making it more engaging for visitors.
2. Automatic Social Media Posting
Jetpack enables you to streamline your social media presence. You can share your blog posts on popular social media platforms. This feature saves your time and ensures your content reaches a broader audience. This boosts your blog’s visibility.
3. Email Subscriptions
Jetpack includes a built-in email subscription feature. It lets your readers stay updated with your latest posts via email. By allowing visitors to subscribe to your blog. You can nurture a loyal readership and drive repeat traffic.
4. Recent Tweets
Jetpack and Twitter integration lets you display your recent tweets on your WordPress blog. This feature encourages engagement and provides visitors with real-time Twitter activity updates.
5. Statistics and Analytics
Jetpack offers comprehensive statistics and analytics for your website. It provides valuable insights into your blog’s performance. This includes traffic sources, popular content, and visitor demographics. This data empowers you to make data-driven decisions to optimize your website further.
6. Social Media Commenting
Jetpack’s social media commenting feature lets visitors comment on your blog posts. That too using their existing social media accounts. By simplifying the commenting process. You encourage more interaction and create a seamless user experience.
Installing Jetpack on Your WordPress Website
After understanding the benefits of the Jetpack plugin, let’s dive into the Jetpack installation process.
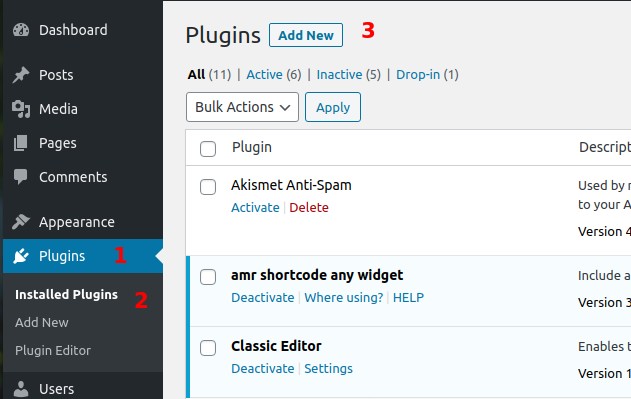
1. Access the WordPress Plugin Directory
- Log into your WordPress administrator dashboard.
- From the left-hand menu. Click on Plugins > Installed Plugins
- Select Add New.
2. Installing Jetpack
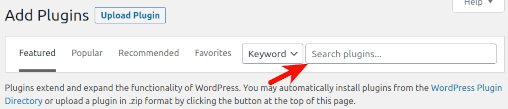
- Type Jetpack in the search box, and hit enter.
- The first result should be Jetpack – WP Security, Backup, Speed, and Growth.

- Click on Install Now next to the plugin title.
- The plugin will then download, unpack, and install itself.
- Once installed, click the Activate Plugin link.
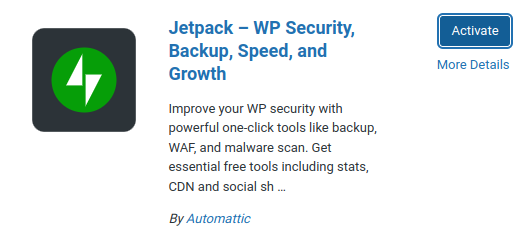
- After activation, you’ll be prompted to set up Jetpack. Click on the Set up Jetpack button.
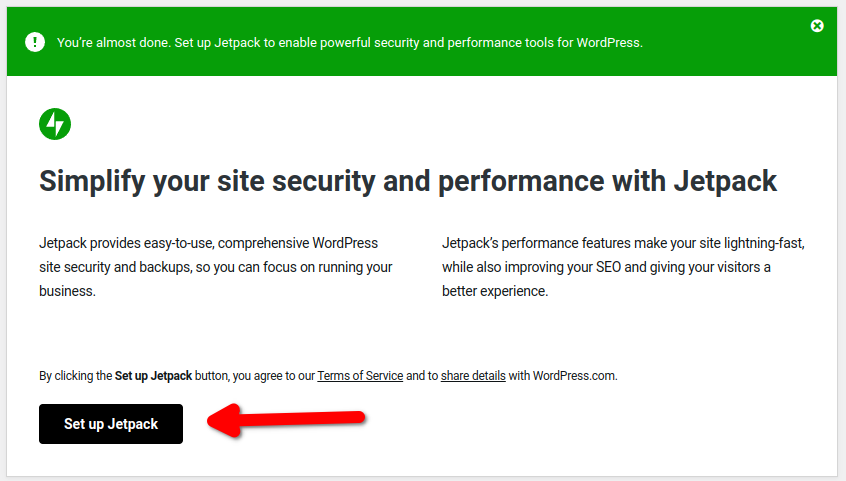
3. Connecting Jetpack to WordPress.com
To use Jetpack’s integrated cloud features, connect it to a WordPress.com account. In case you are not having a WordPress.com account. Visit the WordPress.com website to create one.
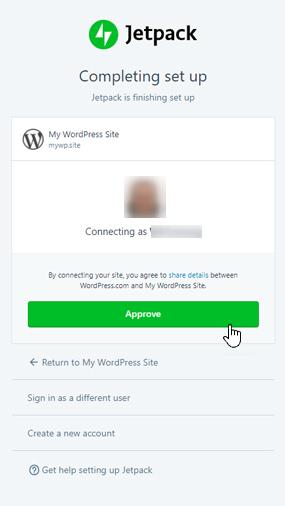
- During Jetpack setup, you’ll get a prompt to establish the connection.
- Click Approve to connect your website to WordPress.com
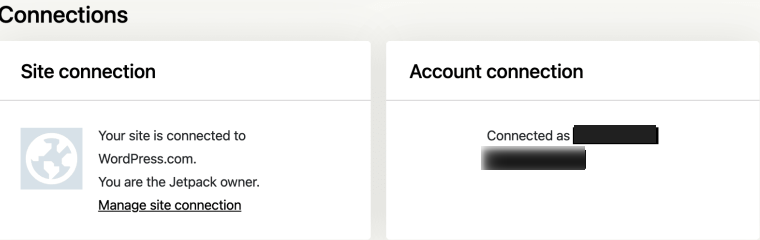
Navigate to Jetpack > Dashboard and view Connections. Using this option, you can confirm your site’s connection to WordPress.com
Congratulations! on installing Jetpack and connecting it to your WordPress website. You’re ready to configure and use its powerful features.
Step 4: Keeping Jetpack Updated
It’s crucial to keep Jetpack updated with the latest features and security enhancements. Follow these steps to update Jetpack :
- Open the Plugins page in your WordPress administrator dashboard.
- Scroll down and locate the “Jetpack” plugin.
- If an update is available, you’ll see an update alert below the plugin.
- When you click the “Update Now” link. It will automatically download and install the most recent version.
Regularly updating Jetpack ensures your website remains optimized and secure. This provides a seamless experience for your visitors.
Conclusion
By installing Jetpack on your self-hosted WordPress website. You unlock a world of powerful features. Features that enhance both the design and functionality of your blog. From the sidebar image widget to automatic social media posting. Email subscriptions to comprehensive statistics. Jetpack empowers you to take your website to new heights.
Follow the simple installation process outlined above to get started with Jetpack. Connect your WordPress.com account to the Jetpack plugin. Update it regularly to leverage the full potential of this plugin.
Remember, installing Jetpack is just the beginning. You should keep exploring its features. This is how you adjust the plugin to suit your unique requirements. With Jetpack, you can outrank your competitors and captivate your audience.
I hope you are clear on how to install Jetpack on WordPress. What is your view?