One of the first things your audiences see when they open Google form is the header image. It’s an important factor in creating an impressive Google form. So to make a good first impression you should choose the right Google Forms header image size.
This article explores the ideal header image size for Google Forms. We’ll cover the steps to upload and remove the header image.
Here are the topics that we cover:
What is the Google Form Header image?
The header image is a banner at the top of your Google Form. Also known as “Google Form banner”. It is the visual centrepiece of a Google Form.
It is the first thing that captures the attention of your respondents. The header sets the tone and establishes a visual connection with your message or brand.
A good head image enhances the aesthetics of your form. It adds a professional touch and improves the user experience. This encourages more visitors to fill out the form.
What is the recommended Google Form Header Image Size?

To ensure your header image is crisp and visually appealing. You should adhere to the recommended dimensions.
A Google Forms header should have a 4:1 aspect ratio. This means your image should be 4 times as compared to its height. If a header image is 400 pixels wide, its height should be 100 pixels.
Based on experience, we recommend header images of 1600×400 pixels.
- Width:1600 pixels
- Height: 400 pixels
Google Forms doesn’t resize the header image on mobile. So If a majority of your users are using mobile devices. you should use the header image of 1000×1400 pixels.
These dimensions strike a perfect balance between image clarity and loading speed. Using a photo with the recommended size ensures optimal visual quality.
Let’s discuss tips for choosing the right Google Form header image.
Tips for Choosing the Right Google Forms Header Image

Now that we know the ideal dimensions. Let’s explore tips to help you select a header image that stands out and aligns with your message or brand.
Relevance and Branding
The header image should match the theme or content of your form. For example, If you’re doing a survey on outdoor activities. You can show some people having a blast in the great outdoors.
Ensure that the header image aligns with your brand. It should be consistent with your brand’s identity.
High-Quality and Eye-Catching
Your header image should be a head-turner, right? Pick a high-resolution image that grabs attention. Avoid blurry or pixelated images.
A sharp and clear image shows your professionalism.
Good Composition
Look for images with a good balance of elements and a clear focal point. The header images shouldn’t overshadow the form’s content. So keep things well-balanced.
File Format and Compression
When it comes to file formats, choose JPEG or PNG. They’re widely supported and offer a good balance between quality and file size.
For a faster page loading speed, don’t forget to compress the image.
Adding the Header Image to Your Google Form
Alright, you’ve got the perfect image. Now, let’s add it to your Google Form.
Here are the steps to follow:
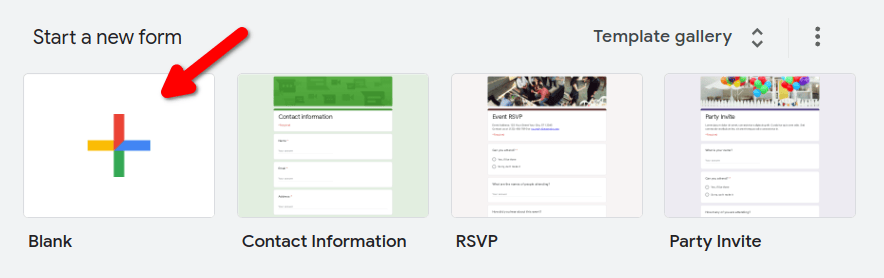
Step 1: Open the Google Form you want to spruce up.
Open the Google Form for changing the header image. Navigate to Google Forms, locate and open the form for editing. You can click on the “+” sign to create a new form.
Step 2: Click the “Customize theme” button.
Click on the Customize theme button on the top-right corner of the form editor. The button looks like the paint palette. It will open a new page with various theme options.

Step 3: Select the Header Image.
From the theme customization option. Search the Header section and click on the Choose Image button.

This opens up 3 options for you.
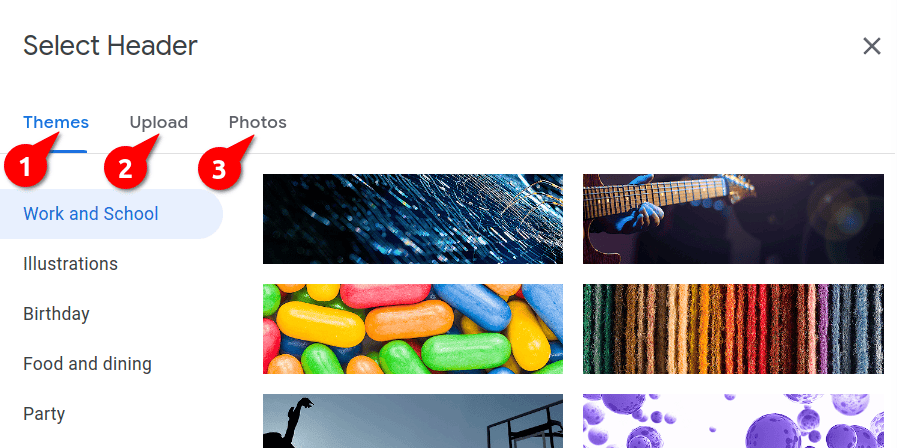
- Upload the image you’ve finished from your computer.
- Choose one from the image themes library option.
- Select an image from Google Photos
Adjust the position and scale of the image as per requirements. i.e 1600×400 pixels
Step 4: Click “Done”
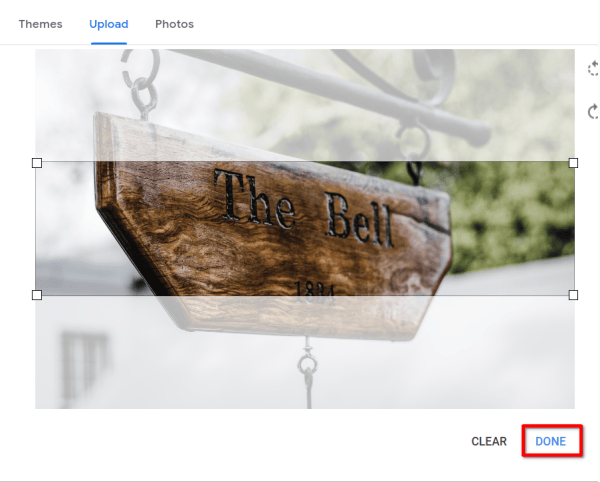
After choosing the header image. Click the “Done” button on the bottom right side of the page. This will save and apply the changes to the form’s header image.
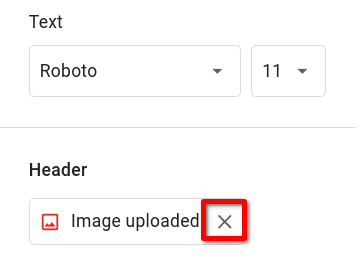
If you want to remove the header image. Click on the “X” button on the header image option.
Conclusion
The header image plays a vital role in engaging your audience. It leaves a lasting impression on your users. Stick to the recommended dimensions of 1600 pixels width and 400 pixels height.
Use other theme options like Text and Colour to personalize your Google Form. For example, you can use a colour scheme that complements the header image colour.
To remove the header image, click on the “X” button on the header image option. I hope you now know how to add a header image to your Google Form.